How to Make Perfect Wax Seals (Tutorials & Troubleshooting)

1. How to Make a Perfectly Round Wax Seal
Read here first if you don't know how to use glue gun or melting stove kit to make wax seals.
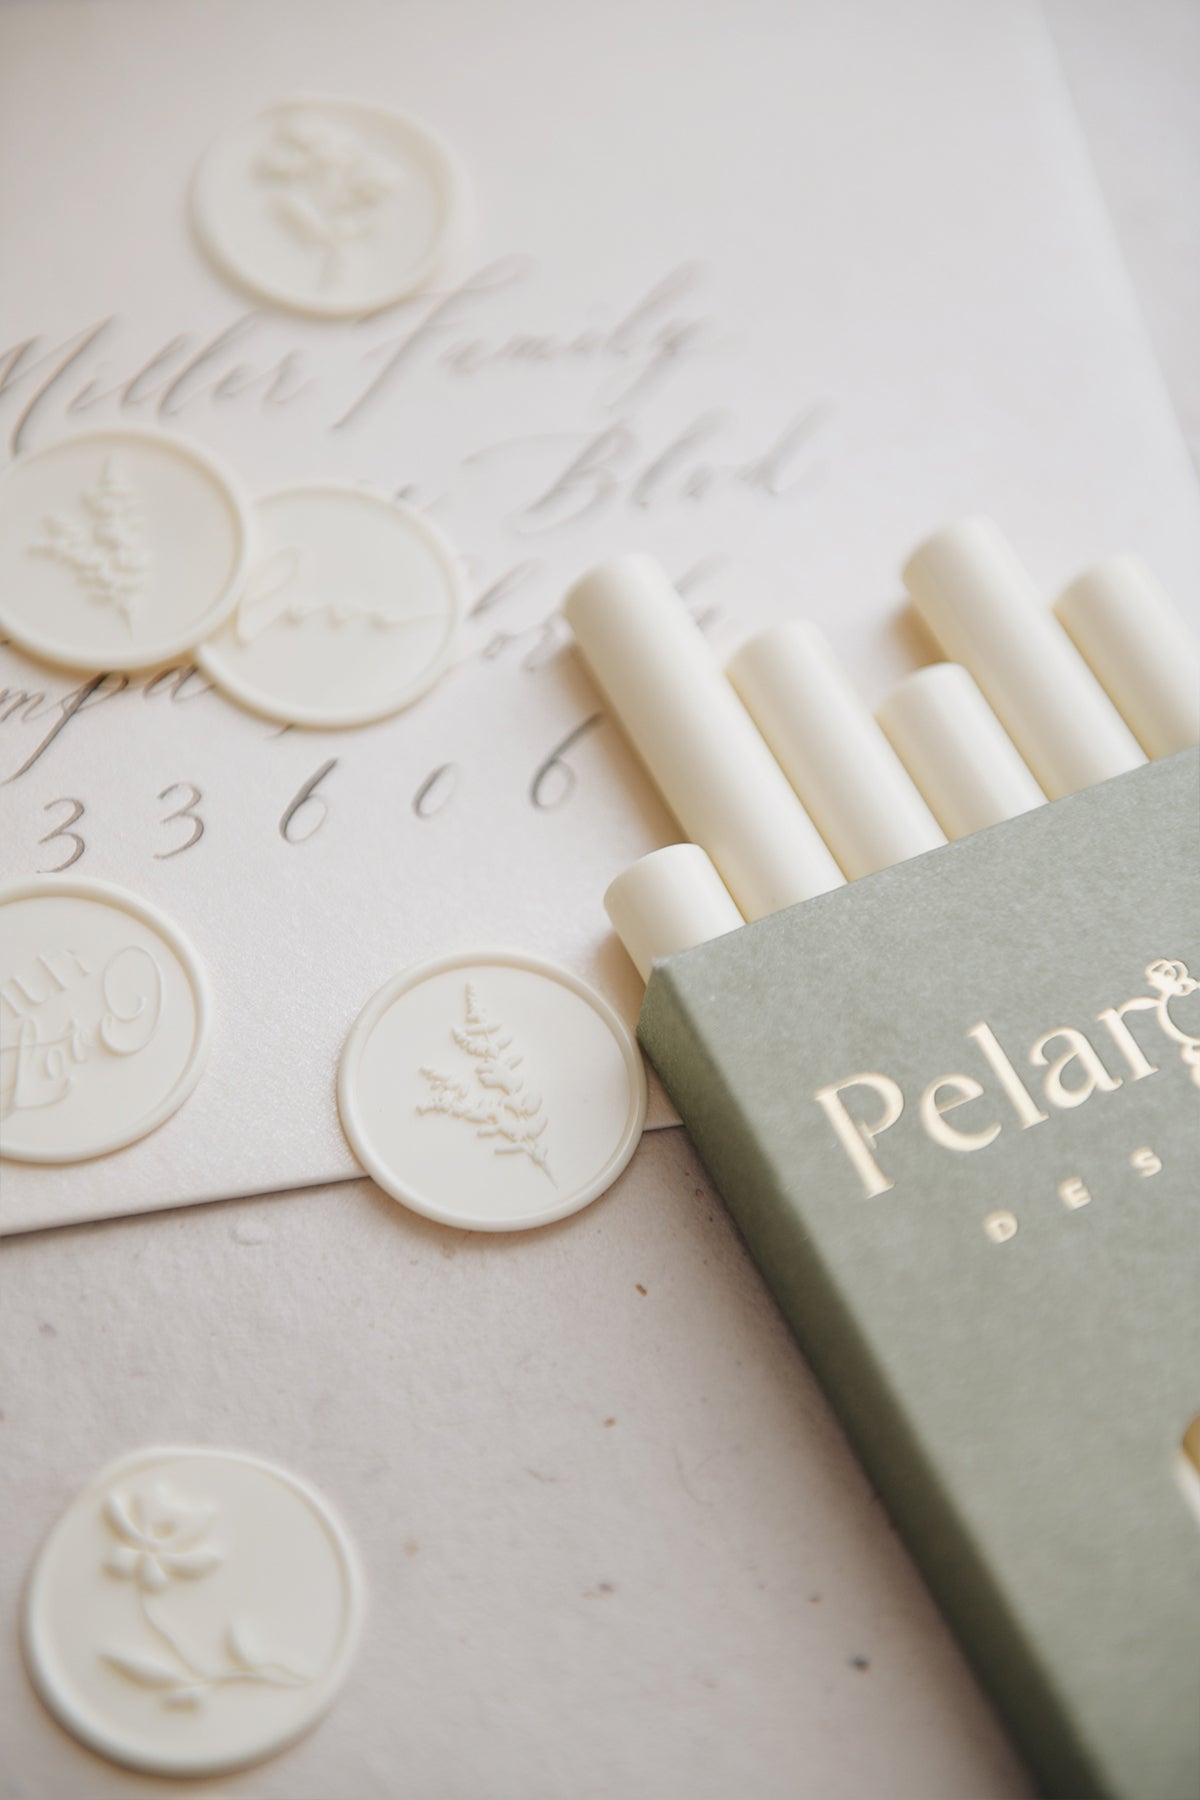
The natural flow and movement of sealing wax is part of its charm - each seal is unique, organic, and full of character. But we’re often asked, “How do you make them so clean and perfectly round?” We hope these little steps help you get there.
A quick note: this is a real-time, unedited guide, no speed-ups, no shortcuts, just honest wax seal magic.
Step 1: A Gentle Pour Begins with a Steady Hand
Set the glue gun on low temperature. As you squeeze out the wax, aim for a rounded, controlled shape. The key is to place the nozzle of your glue gun firmly on the silicone mat and keep it still, no swirling or shifting. Let the wax flow gently from a fixed point. One full squeeze, with just a little extra in the center, is the perfect amount. This creates the ideal base for a clean, balanced seal.
Step 2: Give It a Moment
Here’s the secret: don’t rush the stamp. After pouring the wax, wait about 10 seconds. Let the wax settle and begin to firm up just a little. This short pause makes a world of difference.
Step 3: Stamp with Intention
Now, slowly and steadily press your stamp down. No sudden moves - let it meet the wax with calm confidence. Because the wax is slightly more solid at this point, it’s easier to control the shape and achieve that satisfying, perfect circle. Leave the stamp for another 10 seconds before lifting it.
Round edges vs. Organic edges
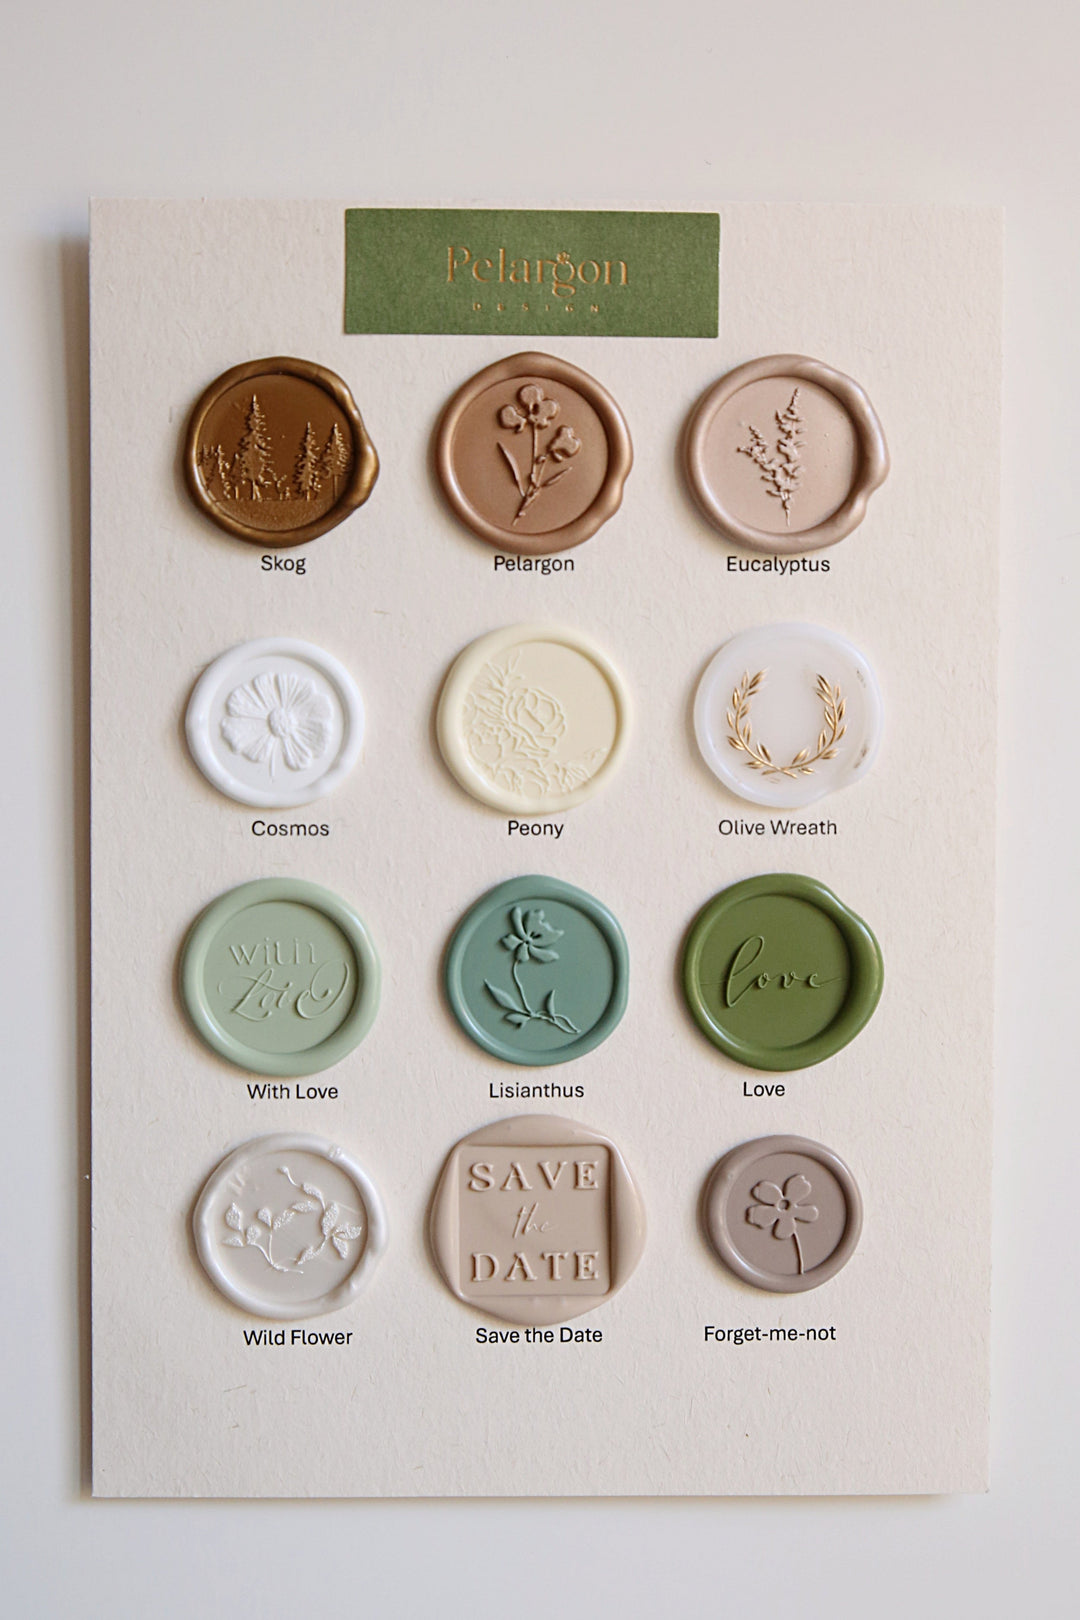
 Stamps Above: Peony and Pelargon
Now Let’s Compare: A Quick Demo of What Not to Do
When the wax is poured carelessly, without paying attention to the shape or amount, and the stamp is pressed down immediately while the wax is still too hot and runny, it tends to slide. That movement creates an uneven, off-centered seal. It may still be beautiful in its own way, but it won’t have that flawless round form.
2. How to Make Wax Seals with Beautiful Organic Edges

Follow the same steps as above - the only difference is in Step 1. Instead of aiming for a perfectly round shape, try experimenting with a square, triangle, or even a cross shape when you pour the wax. Let it flow freely and embrace the irregular edges. Try it and surprise yourself with the beautiful, one-of-a-kind results!
3. How to Create Smooth and Streak-Free Gold Wax Seals
We know this is your second biggest concern - how do you make perfect metallic wax seals without streaks or swirls? It’s all about the right temperature, slow and steady hands, and a bit of patience. Here’s how we do it in our studio:
Step 1: Use a low-temperature glue gun (around 100°C / 212°F)
Metallic wax is especially sensitive to heat. If your glue gun runs too hot, the wax can overheat and lose its lovely finish. If you notice the wax starting to bubble or become too runny, simply unplug the gun and let it cool down a little before continuing.
Step 2: Dispense the wax slowly and steadily
Try not to move the glue gun around as you squeeze. Keep it still and let the wax pool naturally. This is the key to achieving a silky smooth surface. Quick movements or dragging the nozzle will create streaks that appear in the final seal.
Let’s compare - What not to do:
Avoid random squeezing and swirling. If you press too fast or shift the glue gun too much, the wax will be full of uneven lines before you even place your stamp. And yes, those lines will show up clearly in the final seal.
Important tip:
If you’re aiming for that flawless, mirror-smooth metallic finish, we don’t recommend melting metallic wax in a spoon. 🥄 Unfortunately, open-flame melting often creates dark swirls. The glue gun method is the only way we’ve found that consistently delivers a clean, polished result.
Troubleshooting
1. What should I do if the glue gun is too hot and the wax starts to boil?
- Simply unplug your glue gun and wait for about 30 seconds until the wax firms up a little.
2. If your wax stamp is getting stuck in the wax:
- Unplug your glue gun: Use a low-temperature glue gun (around 100°C / 212°F)
If your glue gun runs too hot, the wax is boiling. If you notice the wax starting to bubble or become too runny, simply unplug the gun and let it cool down a little before continuing. - Chill the Stamp: Dip the stamp in icy cold water and wipe the moisture off in between every 3 impression. The cooler temperature will help prevent the wax from sticking.
- Work slowly: Here’s the secret: don’t rush the stamp. After pouring the wax, wait about 10 seconds. Let the wax settle and begin to firm up just a little. This short pause makes a world of difference.
- Proper Pressure: Apply firm and even pressure when pressing the stamp into the wax, then hold it for a few seconds to ensure a clear impression.
- Clean the Stamp: Regularly clean your wax stamp with a soft cloth to remove any residual wax. This ensures a smooth surface for future use.
- Wax Quality: Ensure you are using high-quality sealing wax that is designed for use with wax stamps. Lower-quality waxes might be more prone to sticking.